
FileMint User Guide
Start by creating one file in Finder, then turn on the other features as you need them. If FileMint is not installed yet, follow the installation guide. Screenshots show example files, apps and settings; your initial setup may differ and the interface may change between releases.
Complete the first-time setup
- Open FileMint from Applications. If the General page says the Finder extension is off, click Open Extension Settings, enable FileMint in macOS, then return to the app to check its status.
- Open Finder & Folders and check that your working folder is in the menu scope.
- To save read and write access in advance, authorize your home folder or a working folder in File Access. You can also grant access when an operation asks for it.
- Return to Finder. Right-click the desktop or the background of a configured folder and look for New File.
On macOS 15 and later, the extension switch is usually under System Settings → General → Login Items & Extensions → Finder. On older systems, look under Privacy & Security → Extensions.
Prefer to work without Finder menus? New File… in the app sidebar and Resource Tools → Use Tools work directly in the main app.
Create a file where you are
Make a common file in one step
Right-click the desktop or a folder background in Finder, open New File, then choose an enabled format such as Text (.txt) or Markdown (.md). FileMint creates the file immediately in the location you clicked. If that name already exists, the default behavior is to add a number.
For .docx and .xlsx, follow the Word and Excel steps.
Choose the name and starter content
For a specific filename, destination or first paragraph, choose New File → New File…. Enter a full filename such as project-kickoff.md, check the format and destination, optionally type starter content, then click Create. Cancel writes nothing.
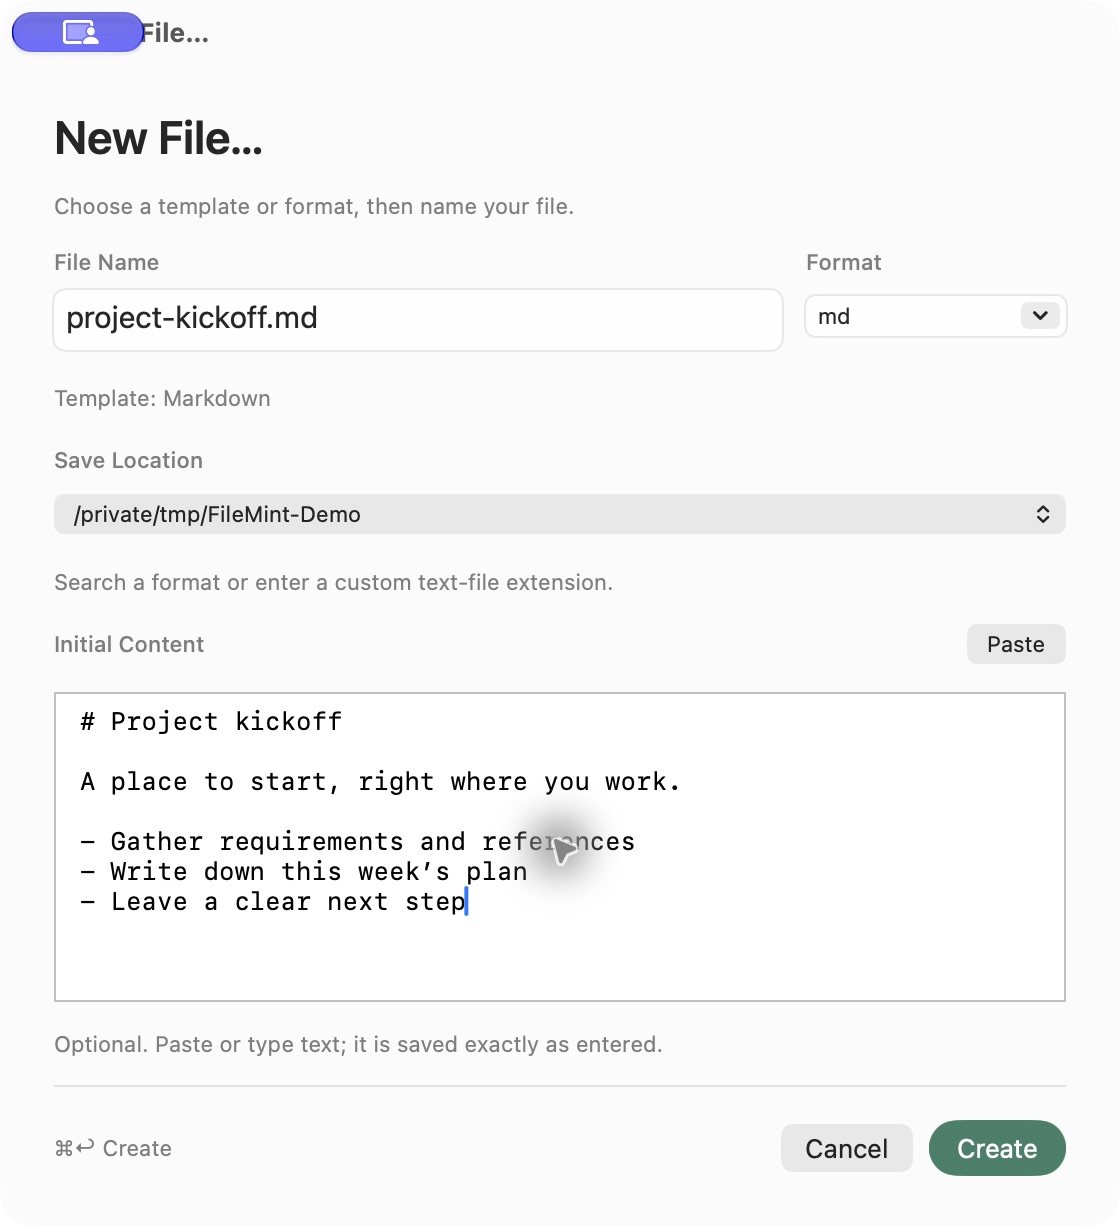
Check the name, format, location and content before creating the file.
A complete filename determines the suffix; choosing a different format updates the name. Starter content is saved exactly as entered. A custom suffix creates a text file; it does not convert text into a Word, Excel or image file.
App, menu-bar and Quick Search creation entries also open this panel directly, without a preliminary folder picker. Change the destination using Save Location. macOS may still request folder authorization when write access is missing.
Keyboard: Use Tab / Shift-Tab to move between controls, ⌘↩ to create, and Esc to cancel. Return inserts a newline in the content editor. The Paste button reads clipboard text only when you click it.
Create a text file from the clipboard
Copy one plain-text item, then choose New File from Clipboard… in Finder's New File menu, the app or the menu bar. FileMint reads the text once and prefills the creation panel. You can change the name, format, destination and text. Only Create writes a file; cancelling saves nothing. File references, multiple clipboard items and empty content are not created as text files.
Create a Word or Excel file from Finder's right-click menu
- In Templates & Types in FileMint, enable Word Document or Excel Workbook. Both are enabled on new installations. If you upgraded from an older version and either template is unchecked, enable it here.
- After first-time setup, open a configured Finder folder and right-click its background. From New File, choose Word Document (.docx) or Excel Workbook (.xlsx). If you placed a template in the main menu, choose it directly from the context menu.
- Find the new file in the current folder. The Word document is blank and the Excel workbook contains one empty worksheet. FileMint adds a number if the filename is already taken, by default.
FileMint includes both blank templates, so you can create the files without installing Microsoft Office.
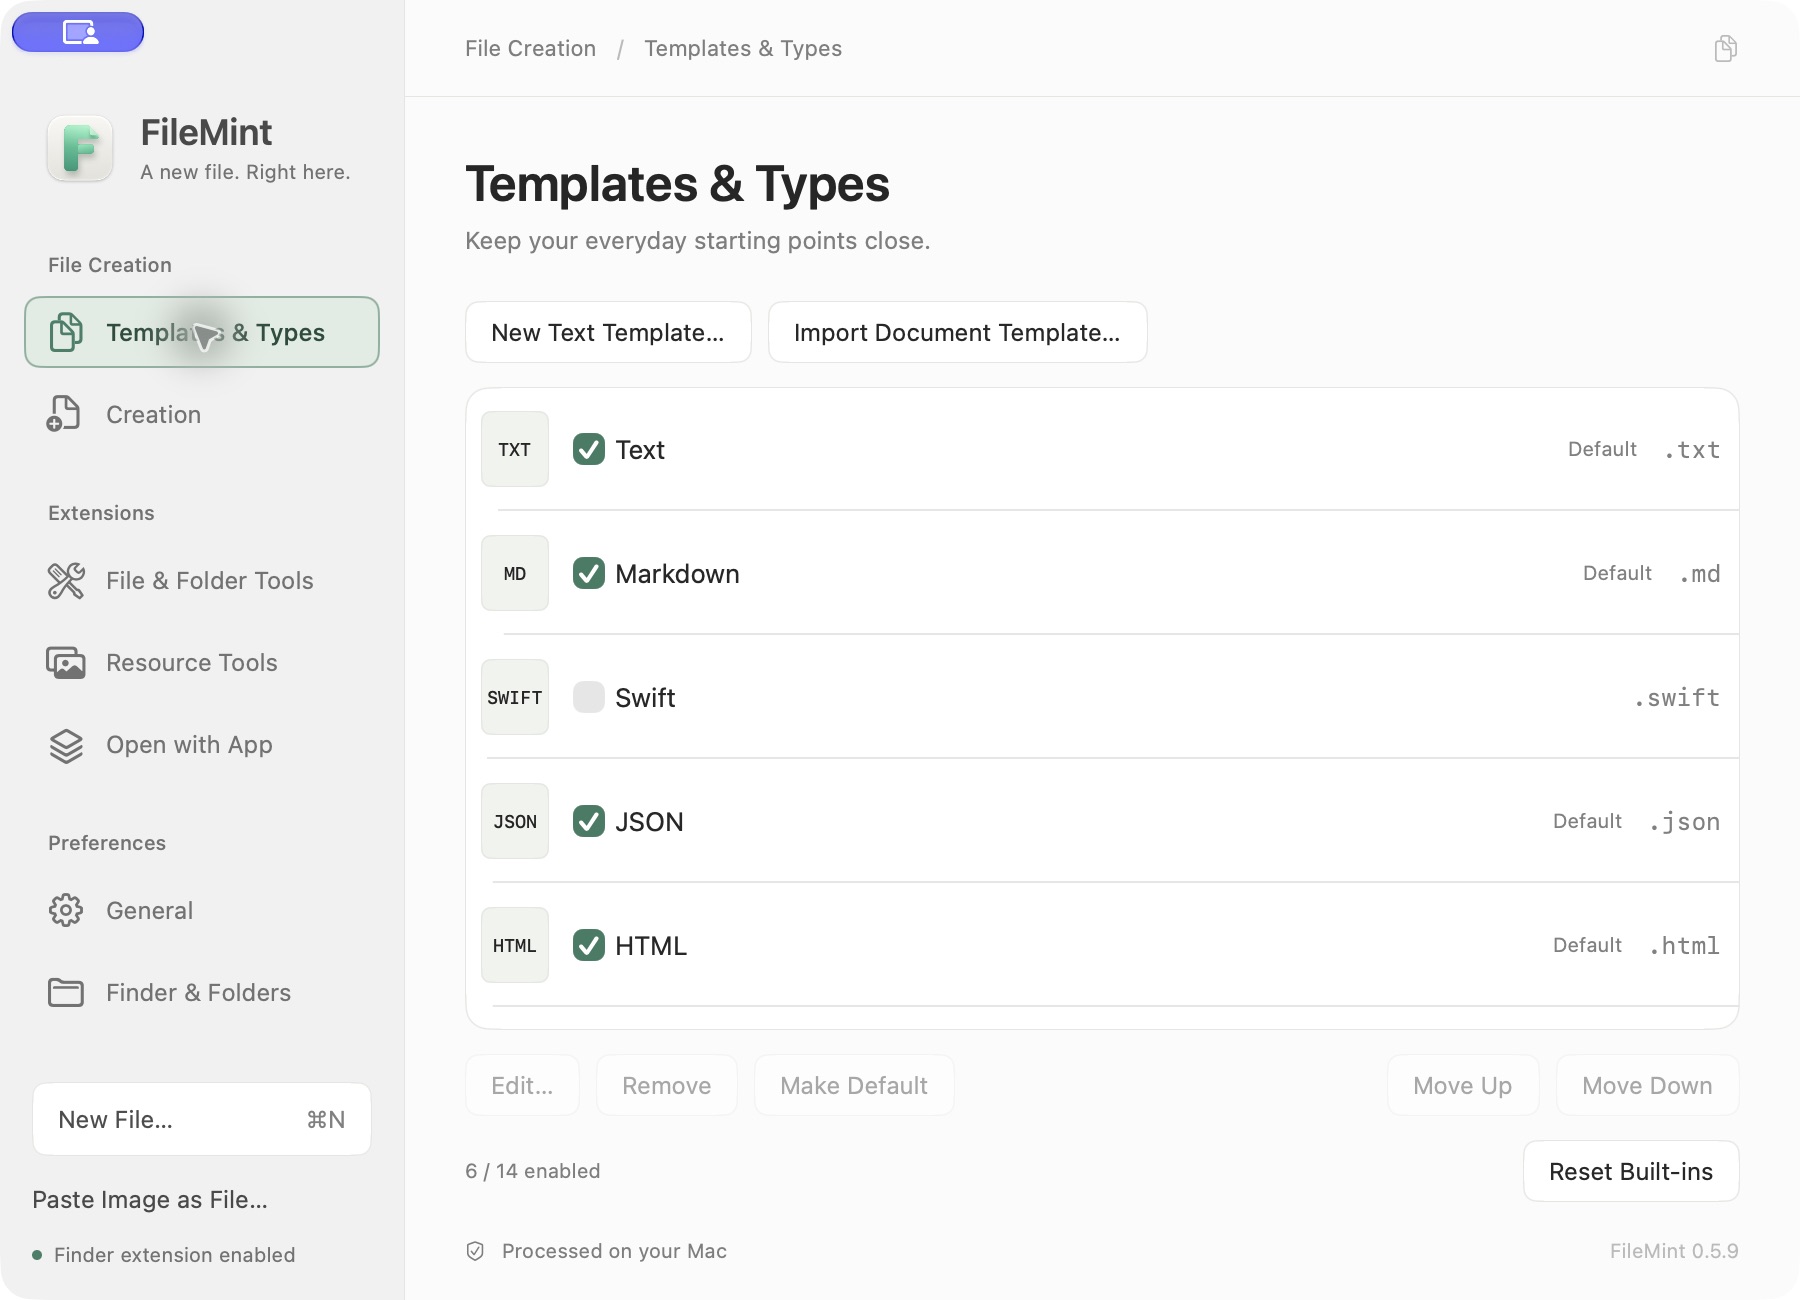
Use Templates & Types to enable formats or import a document as a template.
To start from your own weekly report or budget sheet, click Import Document Template… and choose an existing .docx or .xlsx. FileMint stores an independent template locally. Choosing it in Finder creates a new document with the source formatting and content and leaves the original alone.
Find actions, templates and settings with Quick Search
Choose File → Quick Search… or press Command-Shift-K in FileMint. Type a query and narrow it with Actions, Templates, Favorite Locations or Settings. Use arrow keys to select, Return to execute and Esc to close. Command-1 through Command-5 select All and the four categories. Dismissal retains the session's query and selection; successful execution resets them.
Enable the global shortcut
- Turn on Enable Global Shortcut under General → Quick Search in FileMint. It is off by default. Enabling it with no saved combination fills in Control + Option + K (⌃⌥K).
- Keep FileMint running, switch to another app such as your browser or editor, and press the combination to open Quick Search. Press it again while the search panel has focus to dismiss it.
- To change the combination, click the shortcut recorder and press your preferred keys. Choose another combination if a conflict is reported. Turning the switch off keeps your saved combination; quitting FileMint releases the shortcut.
Quick Search finds creation actions, enabled templates, saved files and folders, and settings pages. It does not scan your disk or index file contents. The global shortcut needs no Accessibility or Input Monitoring permission. The in-app Command-Shift-K remains available independently of the switch. Choosing a template still opens a creation draft; only Create writes a file.
Save reusable templates
Open Templates & Types, enable and reorder the formats you use. Click New Text Template… to add a template name, default filename and starter content. You can keep several templates for one suffix and choose a default. Select the template later from Finder or the creation panel.
You can also import an existing Word or Excel document as a template.
Save a clipboard image as PNG
- Copy a screenshot or bitmap image.
- Choose Paste Image as File… from the FileMint sidebar or Finder's New File menu.
- Check the preview, filename and destination, then click Create.
FileMint reads the image only when you choose this action. Cancelling creates nothing. This action saves PNG and numbers an existing filename automatically.
Open selected items or the current folder with your apps
Open Extensions → Open with App, click Add App, choose a local application, and place it in Finder's main menu or the Open with App submenu. Then select an item or right-click a folder background in a configured Finder location and choose the app. One ordinary selected folder is also passed as a directory.
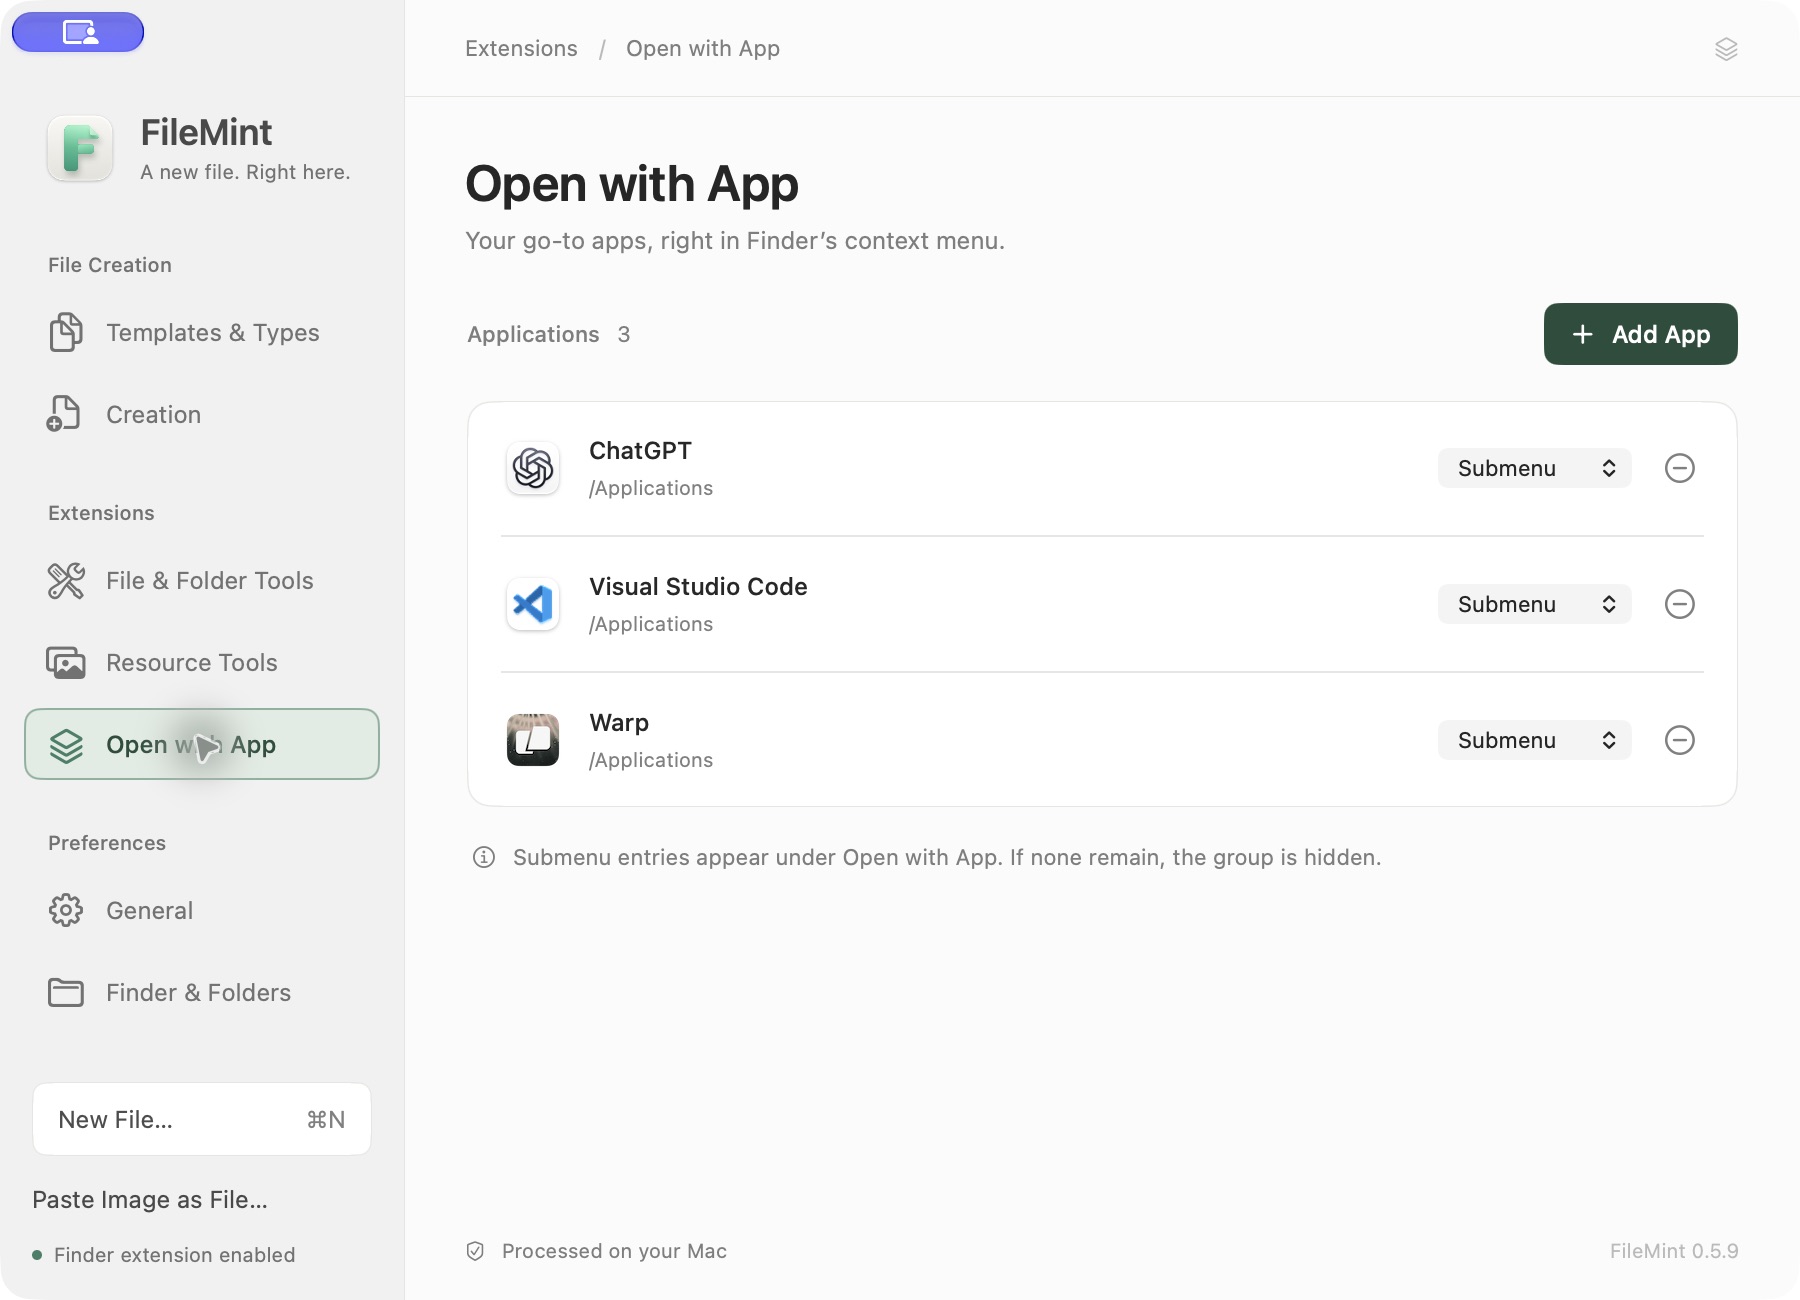
These applications are an example. A new installation starts with an empty list.
Supported terminals offer directory opening modes in the same settings row. Otty supports Follow App and New Tab; the other supported terminals also offer New Window. File selections retain their existing opening behavior. Actual window behavior depends on the installed terminal. This does not change macOS default file associations. If an app is missing from the menu, check that it is still installed at its configured location and that the target folder is within the menu scope.
Enable File & Folder Tools when needed
Open Extensions → File & Folder Tools, enable the master switch, then enable the actions you want. Each action can appear in Finder's main menu or the File & Folder Tools submenu. The master switch starts off.
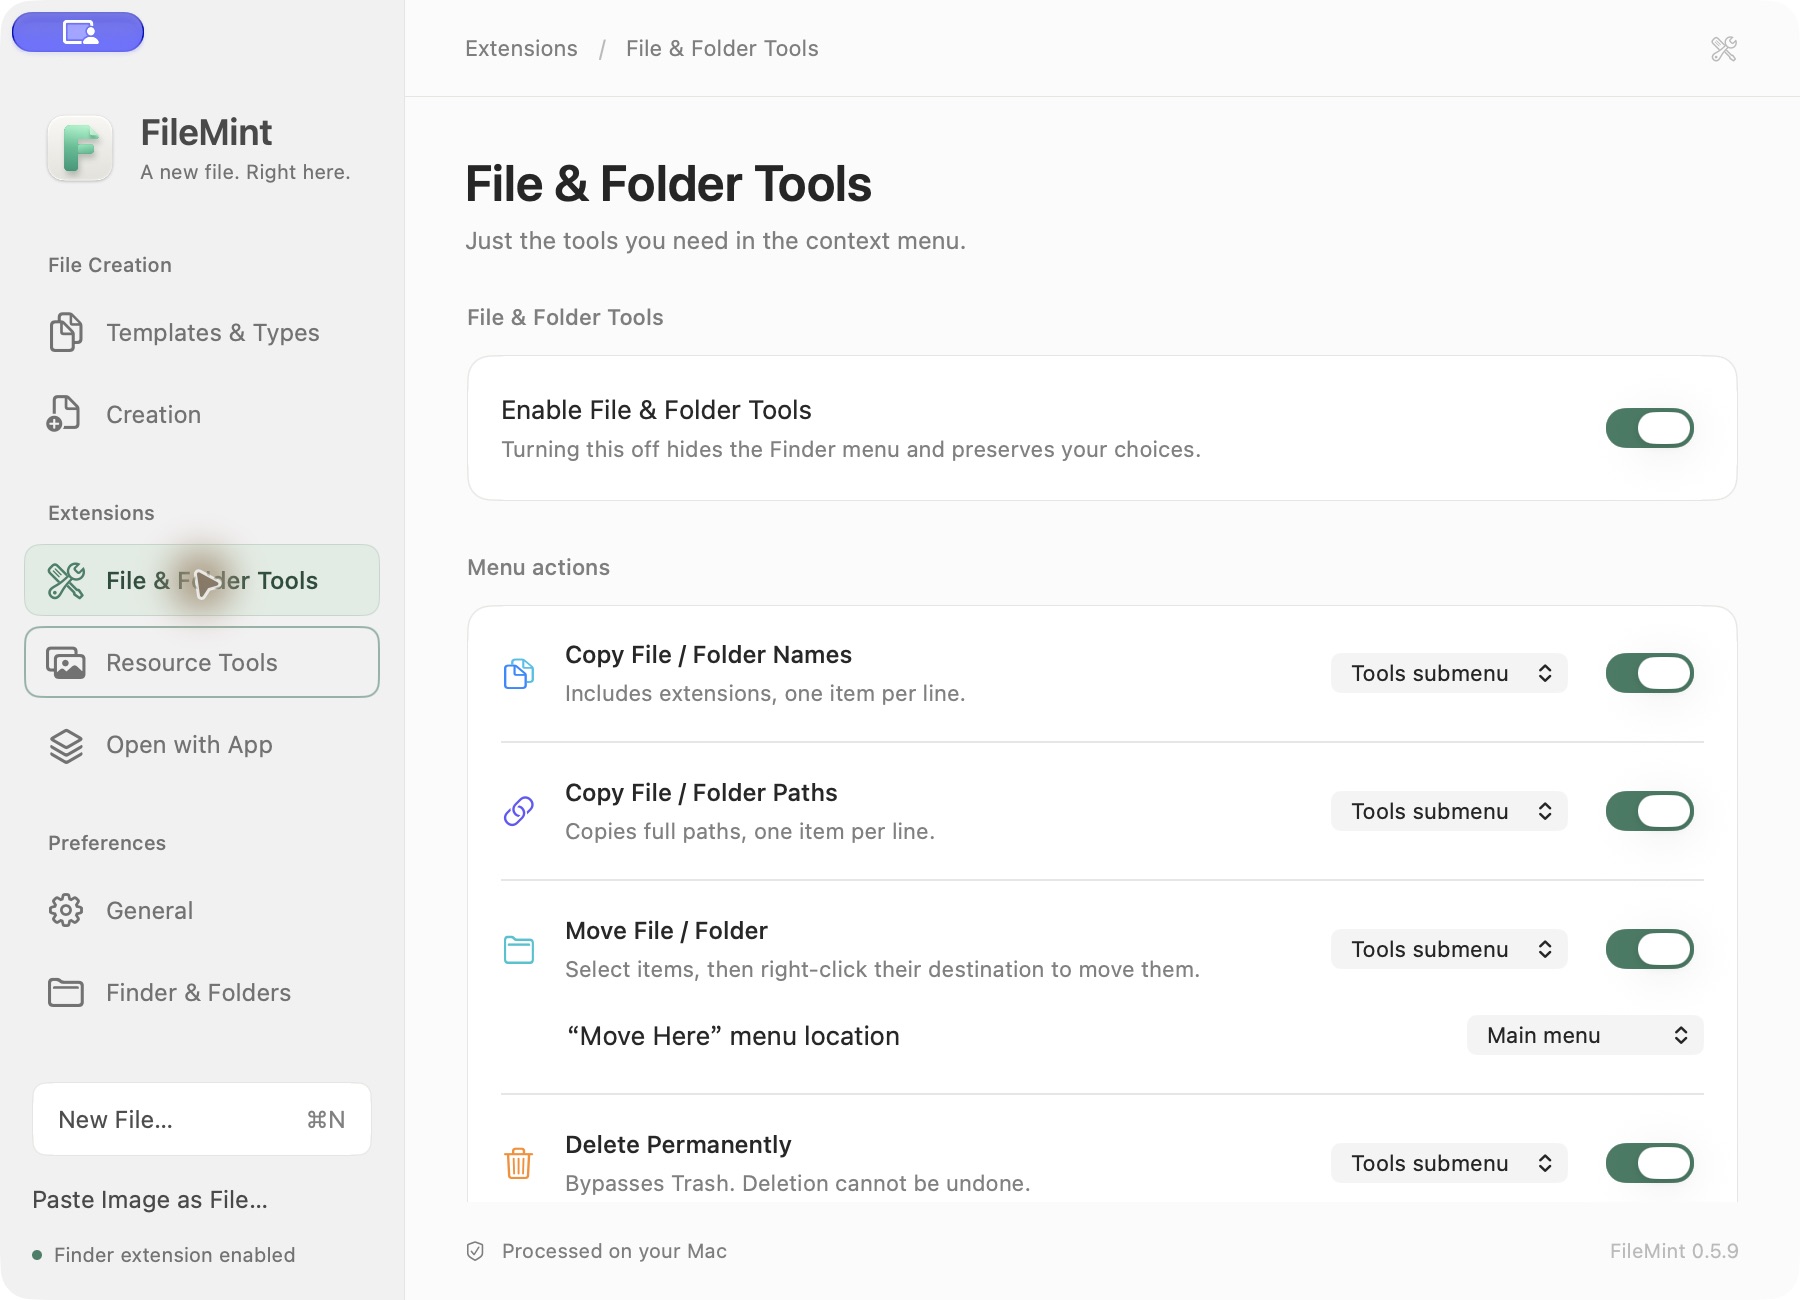
This is an example with tools enabled. Check the Permanent Delete setting before using it.
- Copy Names / Paths: Select one or more items, then use the context menu. Multiple items are copied one per line. With Copy Paths enabled, you can also right-click an in-scope folder background to copy that folder's full path.
- Move File / Folder: Select the source items and choose this action. Then right-click the background of the destination folder and choose Move Selected Items Here. The first step only remembers the sources; existing names are never overwritten or merged.
- Delete Permanently: Bypasses Trash and asks for confirmation by default. It cannot be undone. Enable it only when you need it.
- AirDrop / Send Alias to Desktop: AirDrop opens the native macOS chooser so you select a recipient. An alias points to the original item without moving it.
Copy File Contents
Enable the module and Copy File Contents in File & Folder Tools, then right-click one supported ordinary local text file in Finder. Clipboard publication follows a complete read; if you copy something else while it runs, the older request does not overwrite your newer clipboard.
Enable this child tool, then right-click one supported ordinary local text file to copy its complete contents. Accept UTF-8, BOM-declared UTF-16 and a limited validated RTF subset, with source and decoded text each limited to 8 MiB. Preserve whitespace and line endings without truncation; failure or cancellation leaves the clipboard untouched. Images, PDF, Office documents, RTF attachments and tables are unsupported.
Batch Rename
Number a photo collection, organize project files, or apply a list of names you already have. Preview the changes first. This tool starts off.
- In Extensions → File & Folder Tools, enable the master switch and Batch Rename.
- Select 2–1,000 ordinary files or folders in one Finder directory, then choose Batch Rename…. Current support is local, writable APFS, subject to system permissions and the actual state of the files.
- In Rules, combine replacement, deletion, prepended/appended text, numbering or case rules in order. Or choose Name List and paste one name without its protected extension per item, following the preview order.
- Compare original and new names, check the status, then click Rename N Items. Conflicts and invalid names block execution without overwriting existing items.
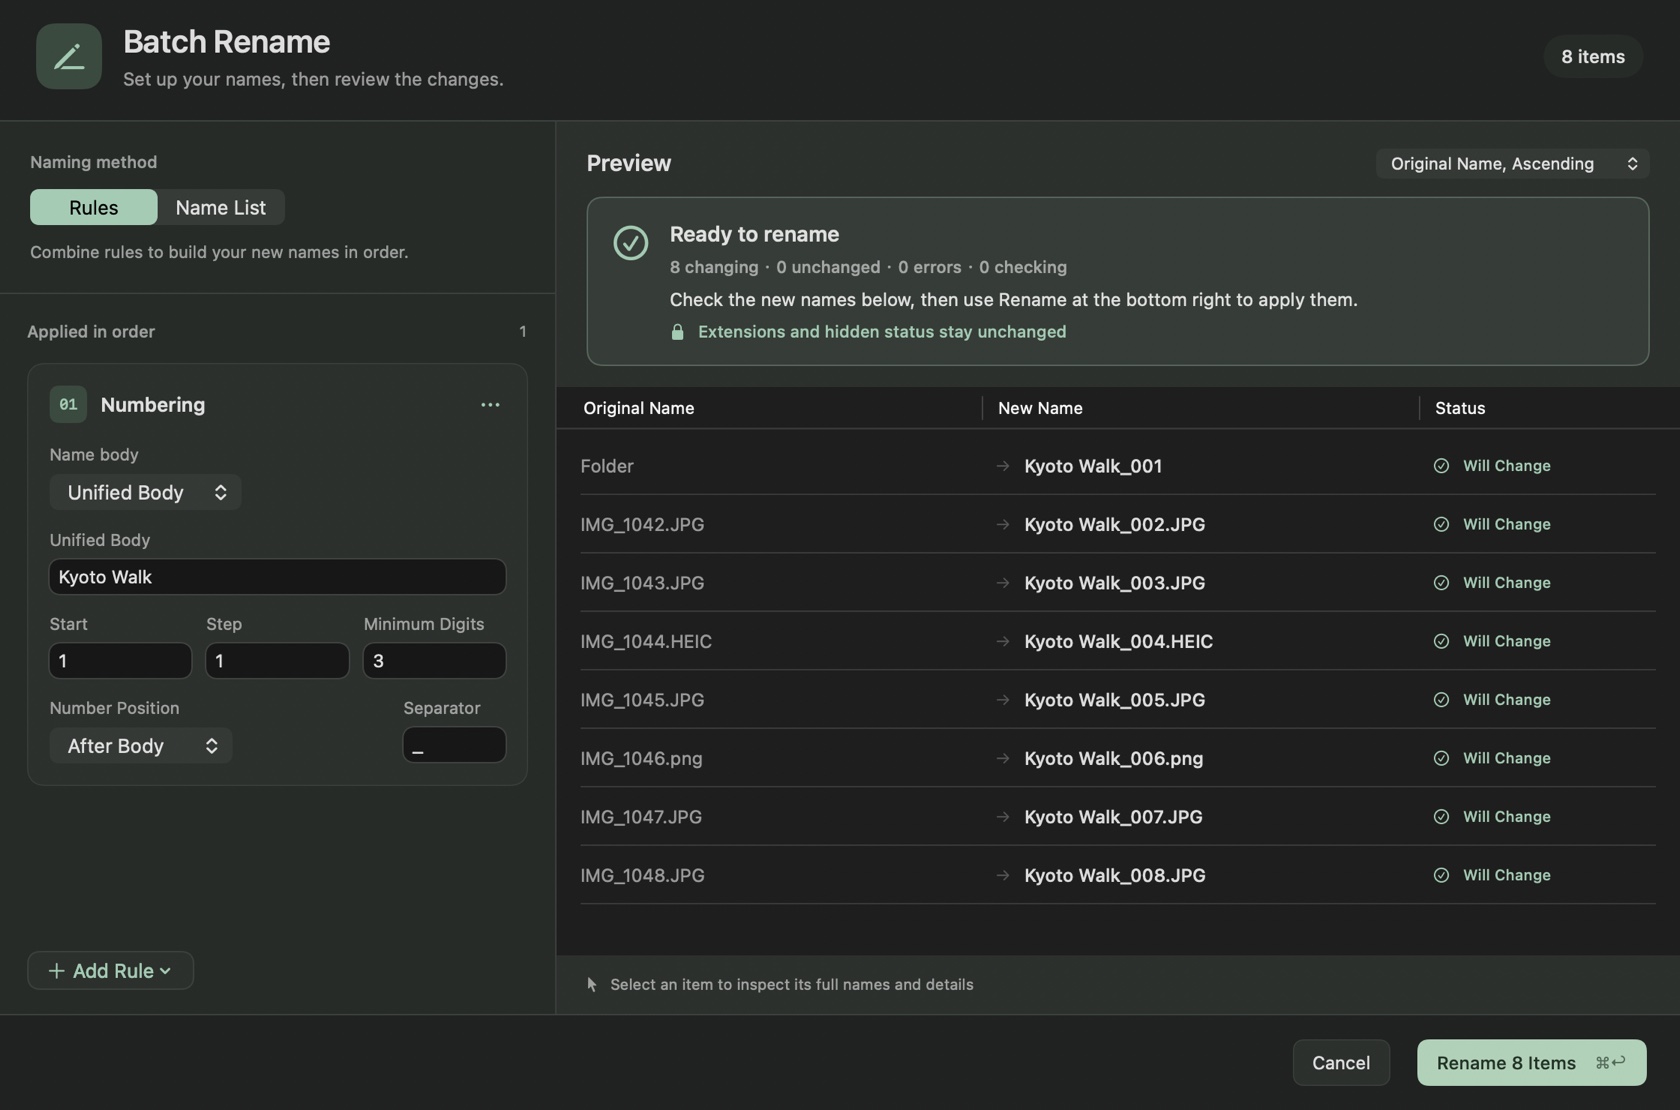
Example numbering rule. Extensions and hidden status stay unchanged; the preview itself does not rename files.
Each name-list line contains only the name body; do not repeat the extension. Files without an extension cannot gain one through the new name. Return edits the focused field without renaming the batch. After reviewing the preview, use the button or ⌘↩ to execute.
To undo: Choose Undo Last Batch Rename… in the result panel or the app's File menu, then review and confirm the reverse preview for the most recent successful operation. Interrupted operations offer restoration of their pre-operation names. If manual handling is needed, export recovery evidence and explicitly unblock the tool. A batch is not atomic; recovery conflicts preserve files and records for further handling. NAS, iCloud and third-party sync compatibility remain unverified.
File Info and checksums
Check a download or a shared file against a checksum supplied by its publisher, starting right in Finder. This tool starts off.
- In Extensions → File & Folder Tools, enable the master switch and File Info.
- Select one ordinary file in Finder, then choose File Info…. Opening the panel shows its name, kind, size, location and dates without calculating.
- Keep the recommended SHA-256 default, or choose SHA-512, SHA-1, MD5 or all four, then click Calculate. All four are calculated in a single read. You can cancel while it runs.
- Use Copy result, or copy all results in All mode. To compare, first select and calculate one algorithm, expand Compare checksum, and paste an expected value for that algorithm. The panel distinguishes a match, a mismatch and invalid input.
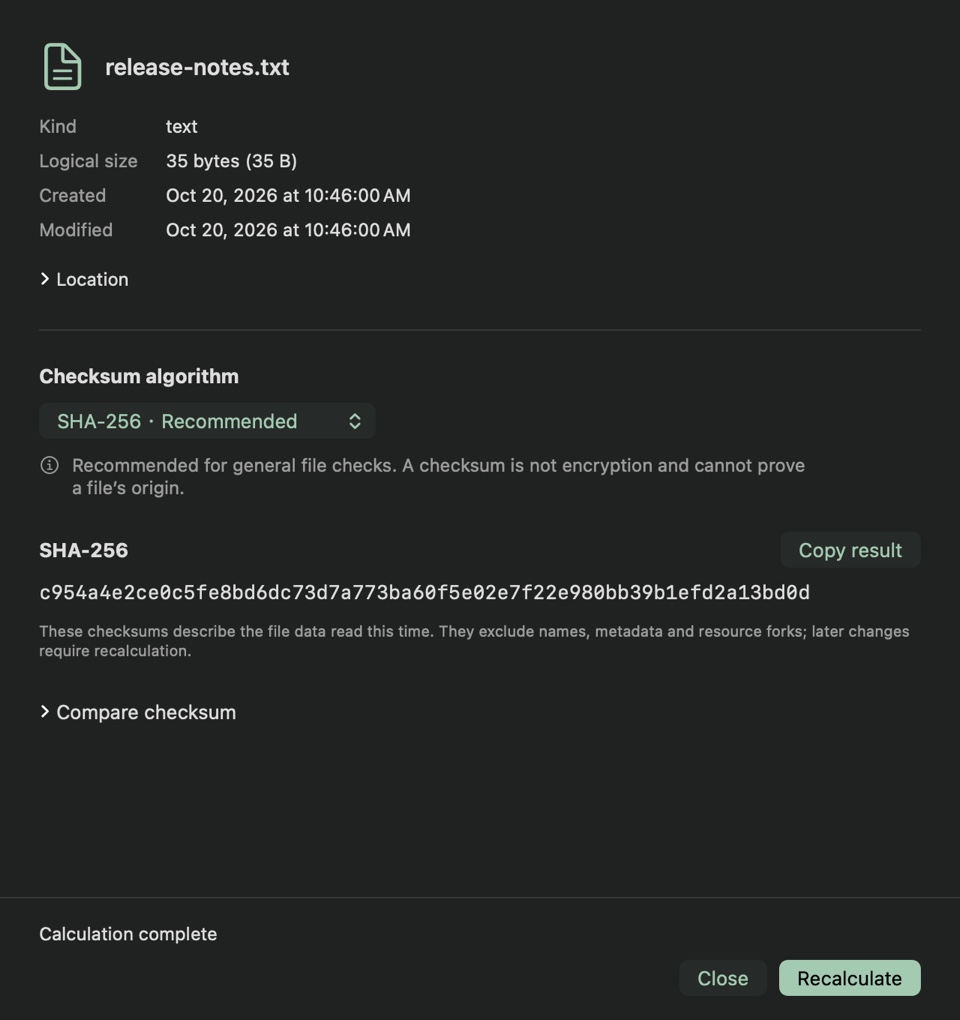
Example SHA-256 result. File contents are read only when calculation is requested. Changing the algorithm requires a new calculation.
Results describe the file contents read this time; later changes require recalculation. MD5 and SHA-1 are for legacy compatibility. Checksums are not encryption or proof of origin. Download known cloud placeholders in Finder first. Folders, packages, links, aliases and multiple selections do not show this entry. Detected changes, read failures and cancellation discard results. Closing cancels the read and waits for cleanup.
Process images and extract text
In the app, open Extensions → Resource Tools → Use Tools and choose local images. Finder menu integration is not required. To start from Finder, enable the default-off Resource Tools master switch and the actions you need under Finder Menu Settings, then select images and right-click.
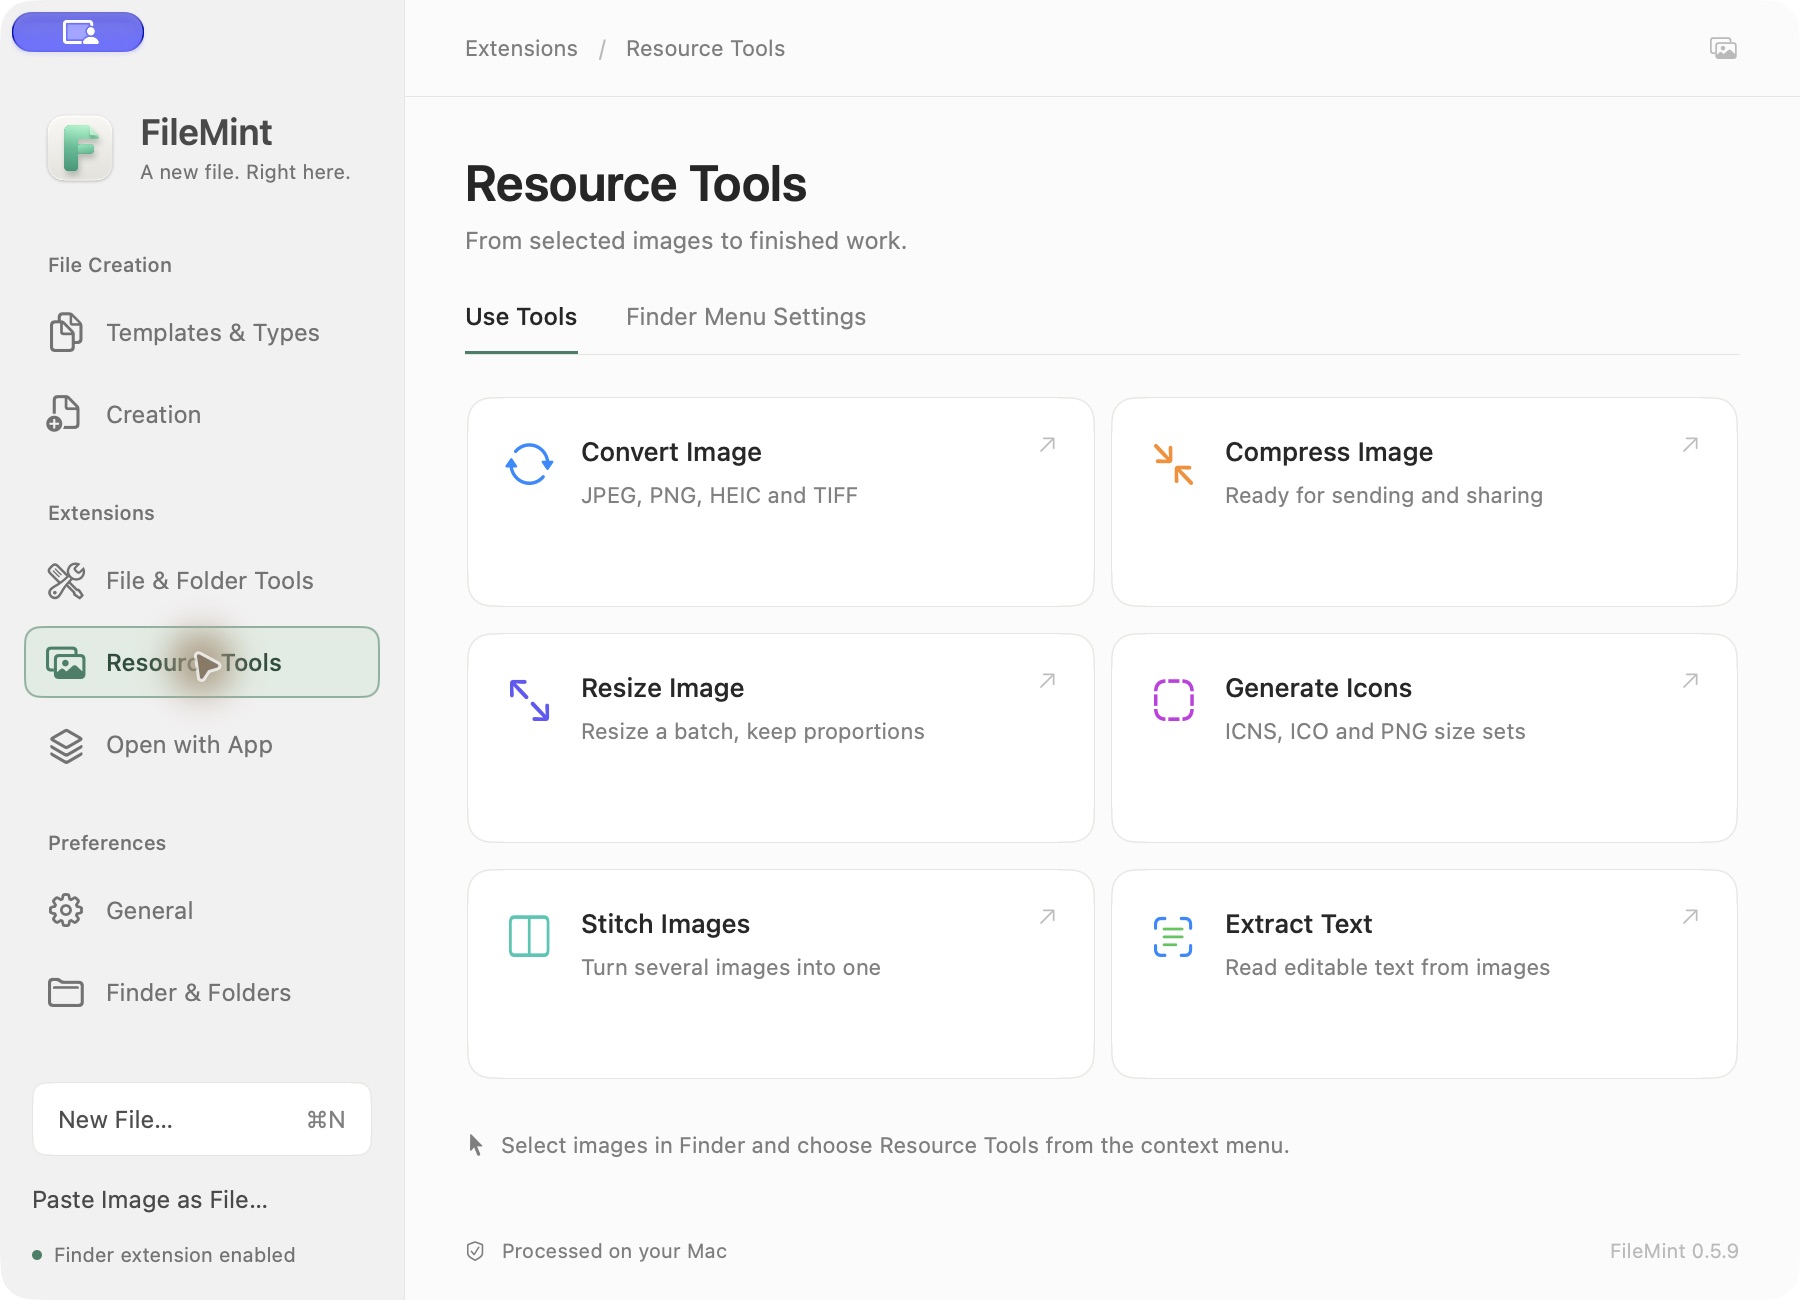
Use Tools works inside the app; Finder integration is a separate choice.
Convert between JPEG, PNG, HEIC and TIFF; compress or resize; generate icons; stitch at least two images; or extract text with OCR. The processing panel shows a preview and output location before you run an action. Originals stay unchanged and results are saved separately. You can edit OCR text, then explicitly copy it or save a TXT file.
Toggle hidden files in Finder
- In Extensions → File & Folder Tools, enable the module and Toggle Hidden Files. Choose the main context menu or the tools submenu for the command.
- In a configured Finder folder, right-click the background or selected items and choose Toggle Hidden Files. It works like
⌘⇧.in Finder, including for names that start with a period, such as.env. - On first use, follow the prompt to enable FileMint in System Settings → Privacy & Security → Device Control and Data Access on macOS 27 or later, or Accessibility on earlier versions. Once the switch is on, quit and reopen FileMint, then choose the command again.
Save and find Favorite Locations
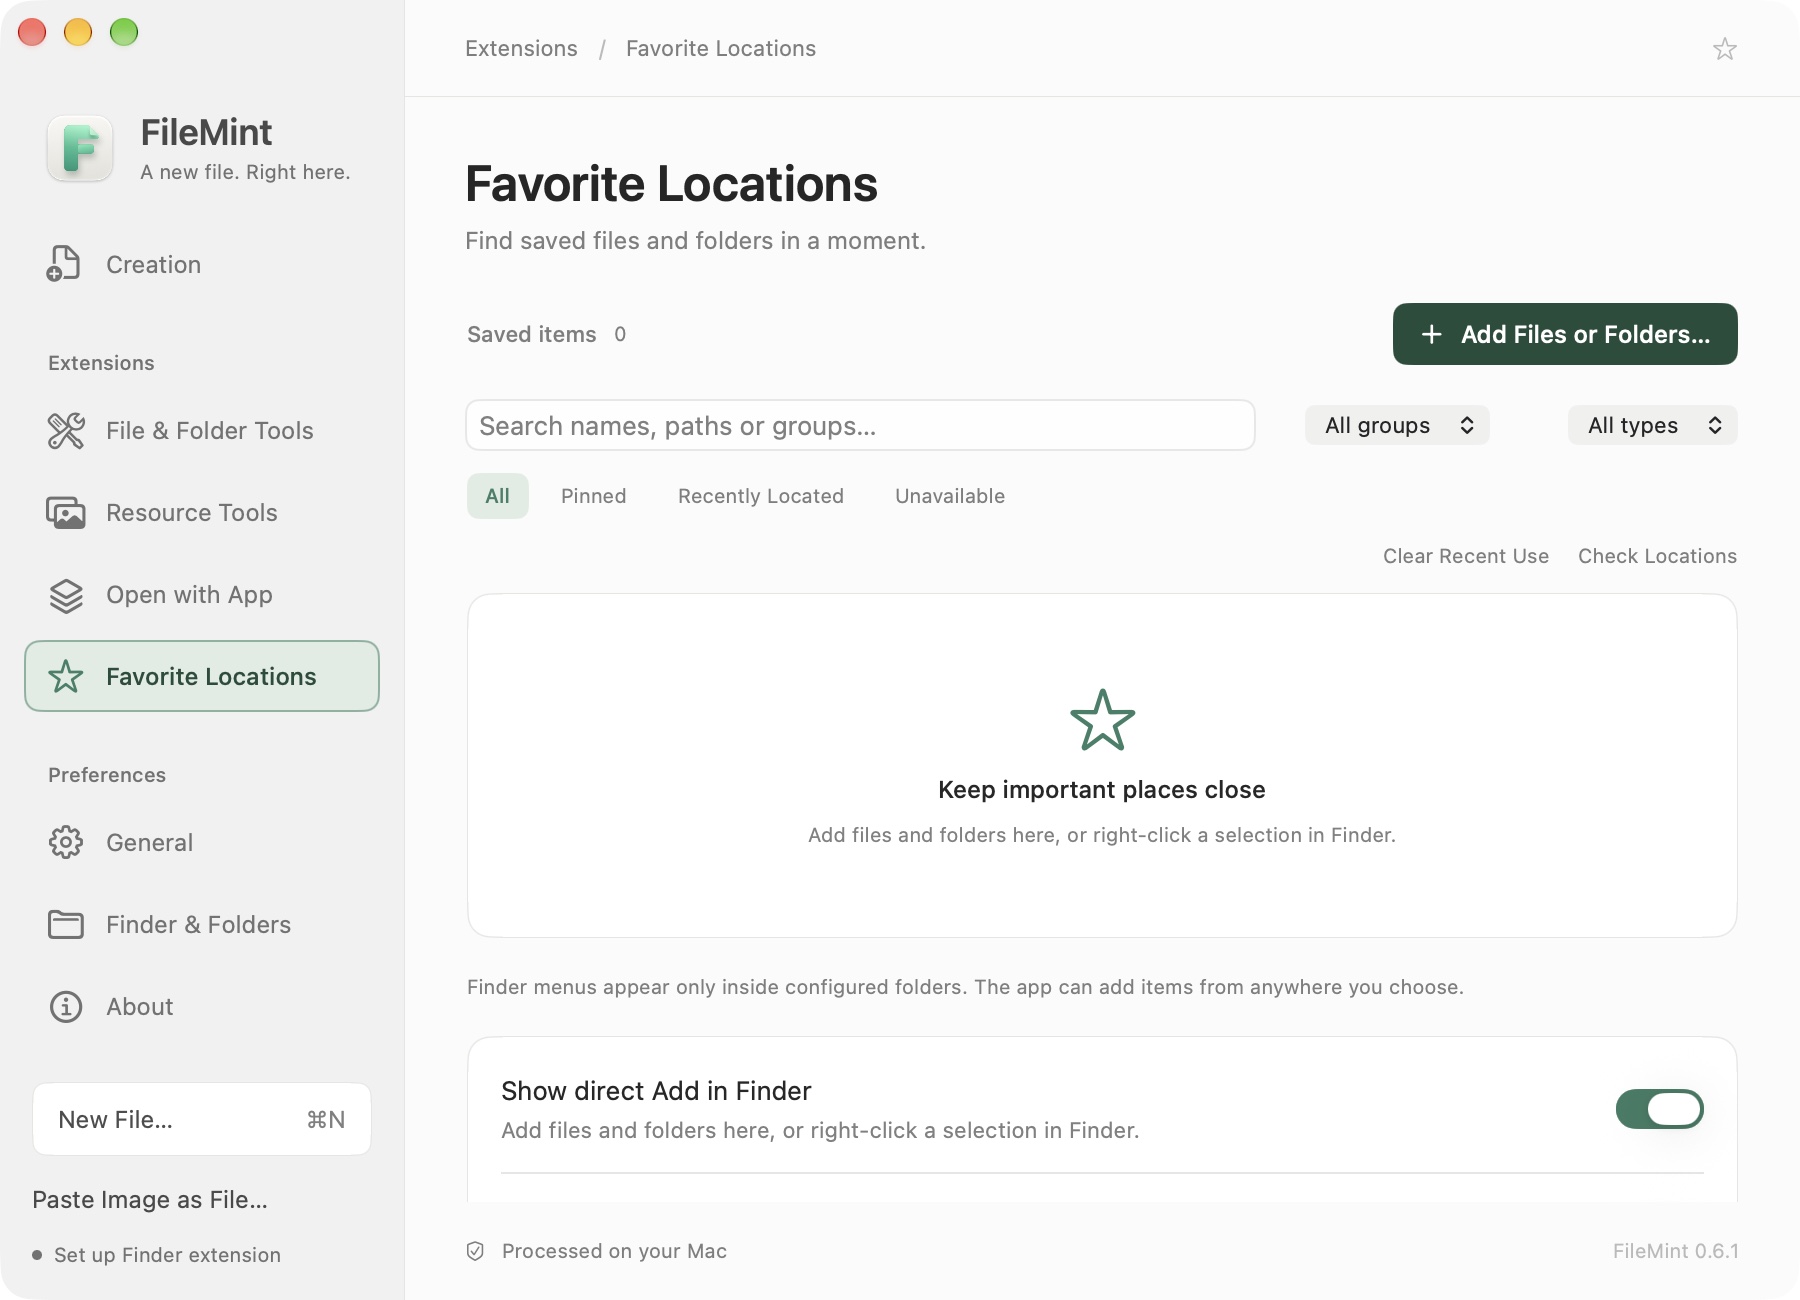
Example interface. Favorites include only items you add; folders are not crawled.
- Open Extensions → Favorite Locations and choose Add Files or Folders…, or drop items onto the list.
- In a configured Finder folder, select a file or folder and choose Add to Favorite Locations from its context menu. This does not expand Finder's authorized scope.
- Search saved names, paths or groups; pin items or change groups in batches. Finder shows at most 6 pinned and 4 recently located items, followed by Search All.
- Locate opens a folder, or opens a file's parent and selects the file. Open File is a separate action.
Remove private image metadata
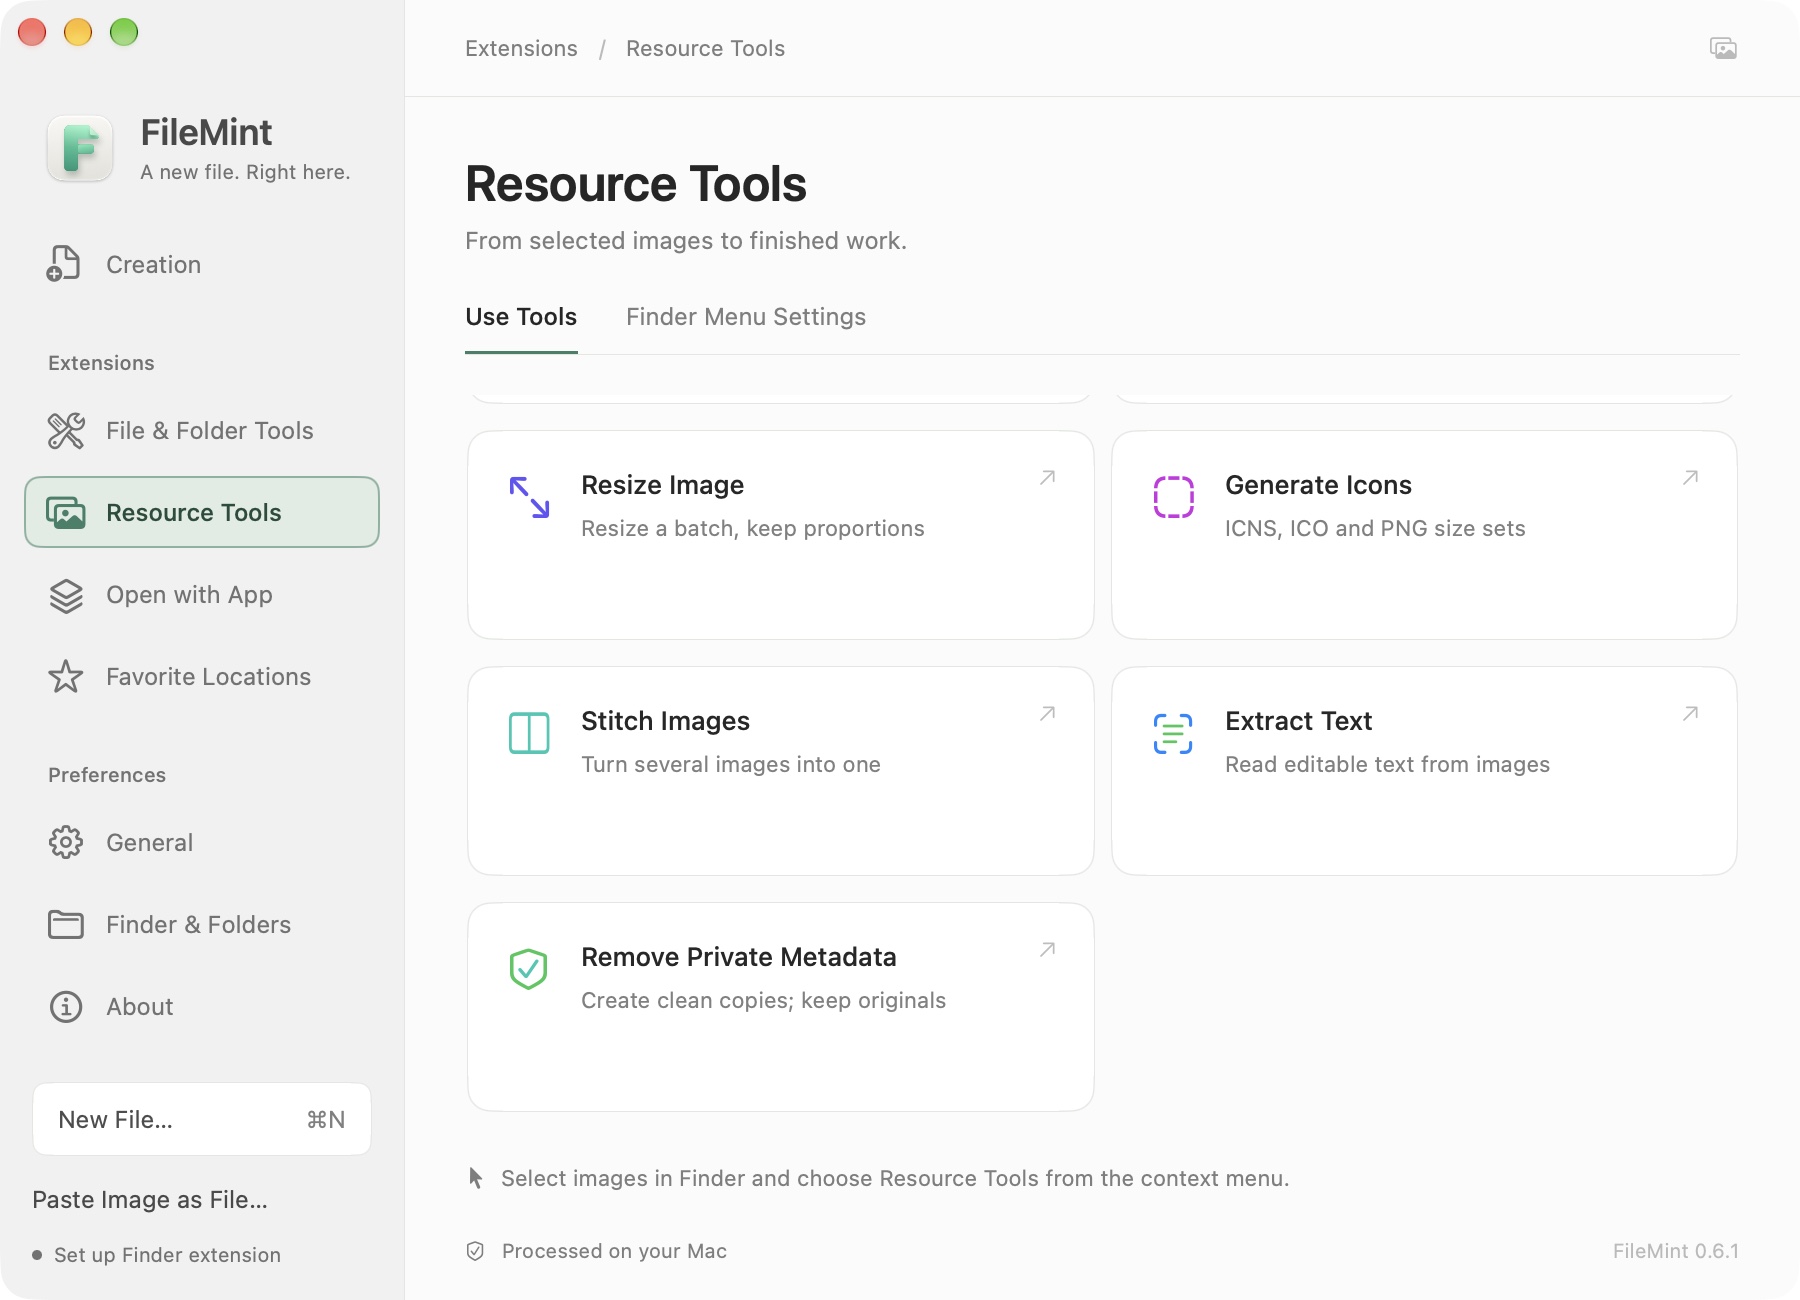
Example interface. The original stays untouched; the output is a separate `-clean` copy.
Choose local images in Resource Tools → Use Tools, or select images in Finder after enabling Resource Tools and choose Remove Private Metadata. The Finder menu item starts the job. It removes location, capture-time, camera, IPTC, XMP and other text metadata. Target formats are JPEG, PNG, TIFF and ordinary single-image HEIC when supported by the system. Unsupported files and failed readback checks do not produce a “clean” copy. Re-encoding can change size or color; filenames and information visible in the pixels are not removed.
Appearance and updates
Under General → Appearance, choose Follow System, Light or Dark, plus English, Chinese or the system language. About has a manual update check. Automatic checks can be disabled in General. See the installation guide for update installation steps.
Finder Menu Icons offers Colored and System Monochrome. Monochrome follows Finder's appearance and menu highlighting; saved colors return when you switch back to Colored. Click the icon button beside a template or supported menu entry to search system symbols, preview an icon, change its colors or reset it. You can still change symbols in monochrome mode while the color controls are disabled. Configured Open with App entries retain their application icons.
If something is not working
No New File menu in Finder: Check the Finder extension status in FileMint and enable its macOS switch if needed. Confirm that you clicked inside the configured menu scope. If the menu has not refreshed after a permission change, relaunch Finder. You can still use New File… in the main app.
What if saving asks for access? Follow FileMint's prompt and select the working folder in the system folder picker. You can review or remove saved folder grants in File Access.
An action is missing: Right-click in the right place: a folder background for creation, selected items for most File & Folder Tools, a selected item or folder background for Copy Paths and Open with App, and supported selected images for Resource Tools. Then check the module switch, action switch and main-menu/submenu placement.
Still stuck? Open a GitHub issue with your macOS and FileMint versions, the entry point you used, and the message you saw. Please leave out private file contents and full paths.